Ref: http://arduino.cc/en/Tutorial/Blink
這是一個基礎使用 LED 的範例程式
硬體設備
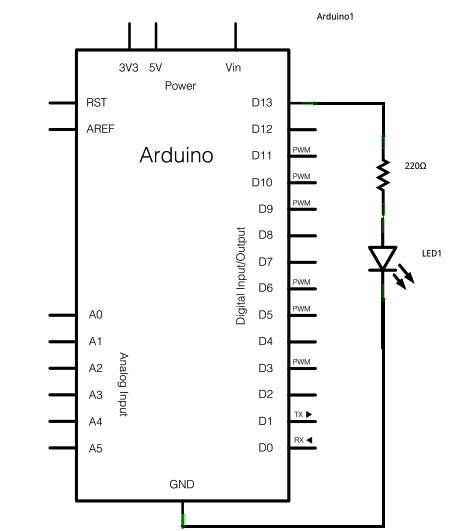
電路
可以使用軟體 Fritzing 來繪製
(1) 選擇 Arduino Uno Board

(2) 加入 LED

和以下的範例電路不同, 我沒有另外增加電阻. 這是因為 Atmel 的 ATmega328P 本身內部已有 pull high 線路.
範例
實際

----------------------------------------------
執行結果
參考
- setup()
- loop()
- pinMode()
- digitalWrite()
- delay()
- BareMinimum: The bare minimum of code needed to start an Arduino sketch.
- Blink: Turn an LED on and off.
- DigitalReadSerial: Read a switch, print the state out to the Arduino Serial Monitor.
- AnalogReadSerial: Read a potentiometer, print its state out to the Arduino Serial Monitor.
- Fade: Demonstrates the use of analog output to fade an LED.
- ReadAnalogVoltage : Reads an analog input and prints the voltage to the serial monitor
沒有留言:
張貼留言